
 Have you ever wanted to create your own VR-enabled virtual tours for your business or project but no idea on how to create one? The wait for figuring out how to create your very own VR-enabled virtual tour is now over! Last week, Concept3D, a leader in creating software to power immersive online experiences, announced the launch of its new Tour Builder platform which allows users to create, manage and share their own VR-enabled virtual tours like never before. Below are the key features of the Concept3D tour builder platform:
 Interactive Hot Spots: Associate text, images and video with a specific point on your map, all stored and managed within the content management system.
- Tours: Take your virtual visitors through your space with a step-by-step 3D virtual tour.
- Live Data Integrations: Monitor your space and gather real-time sensor data from assets in remote locations.
- Contact Points: Emphasize business differentiators and drive sales by capturing customer information at key points on your virtual tour, map, or model.
- Space Planning: Streamline venue configuration, speed sales quotes to RFPs, and demystify equipment allocation.
- Wayfinding: Guide people to locations, inside facilities, and throughout your community.
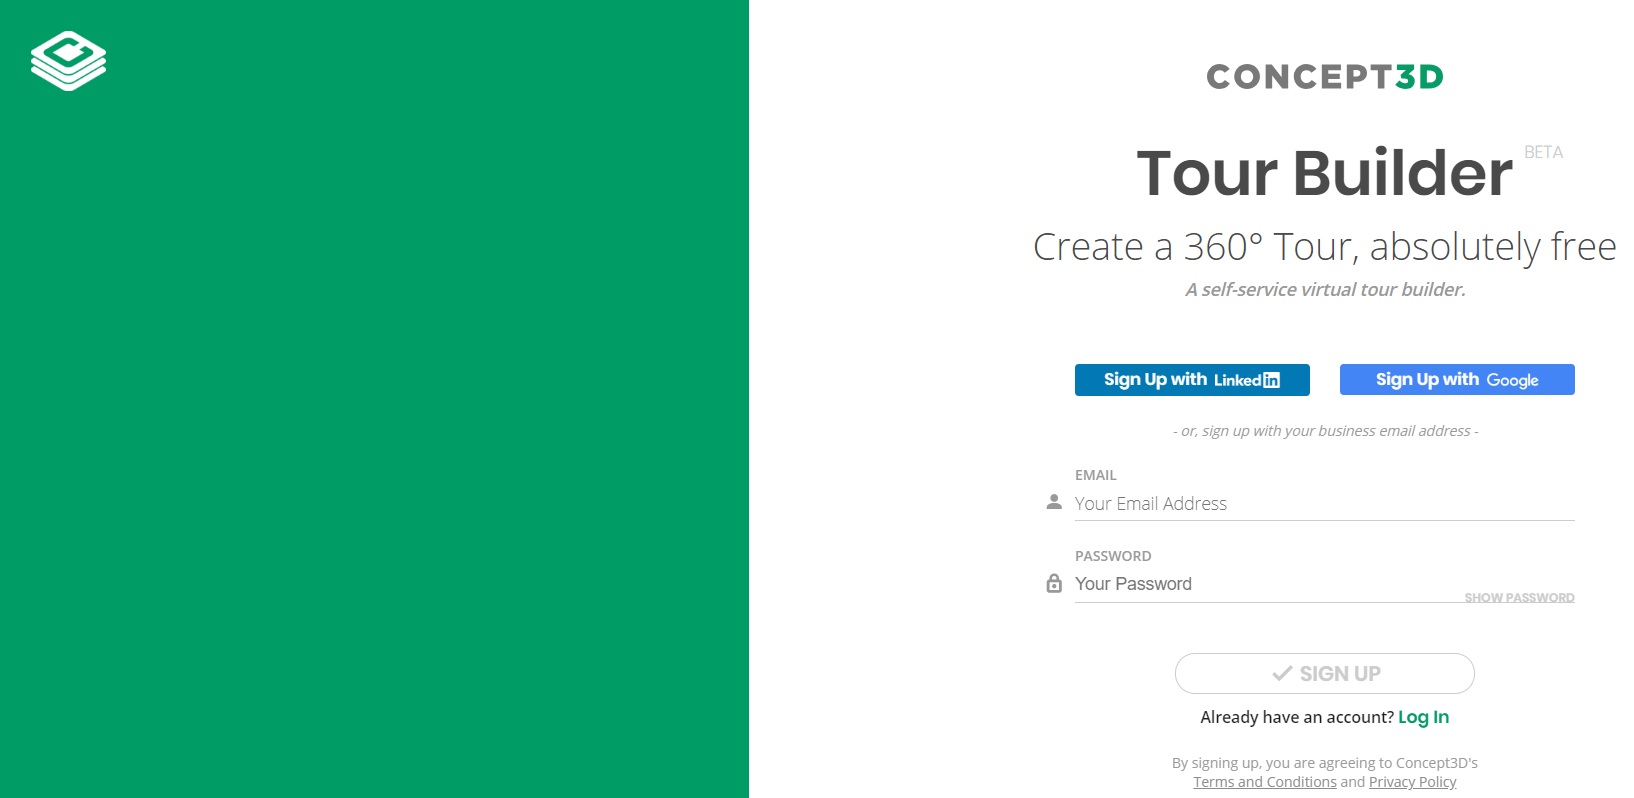 Signing up on Concept3D’s site was easy and also free. You can either use your email address or sign up using your Google or Linkedin accounts. Once created you will go directly to the dashboard where you enter your tour name, location and description.
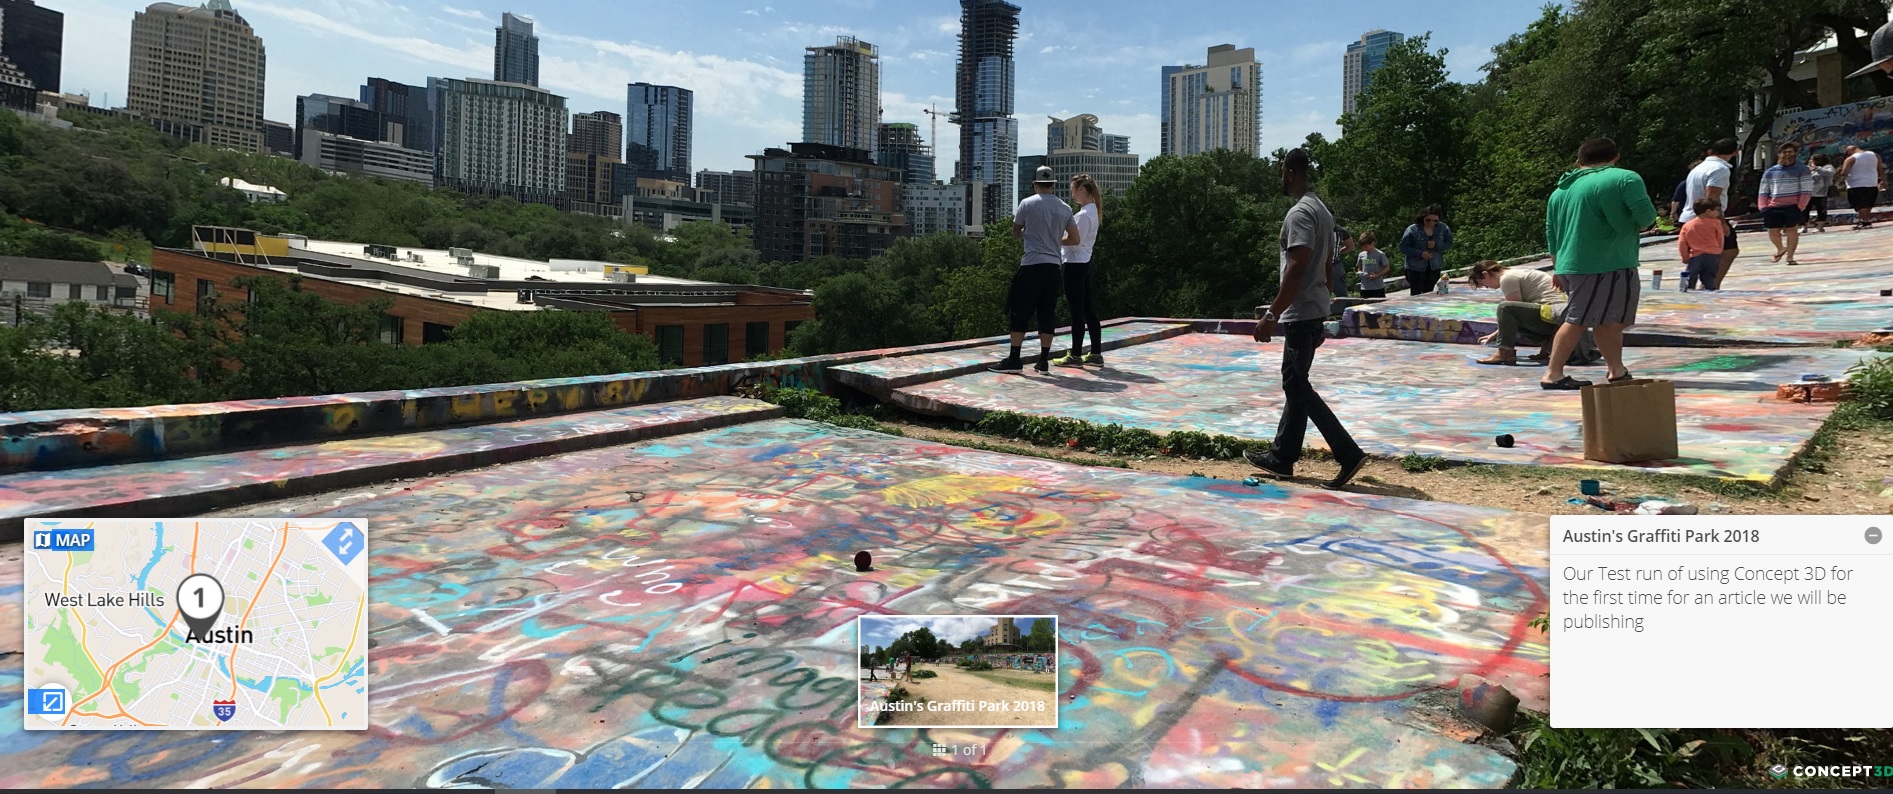
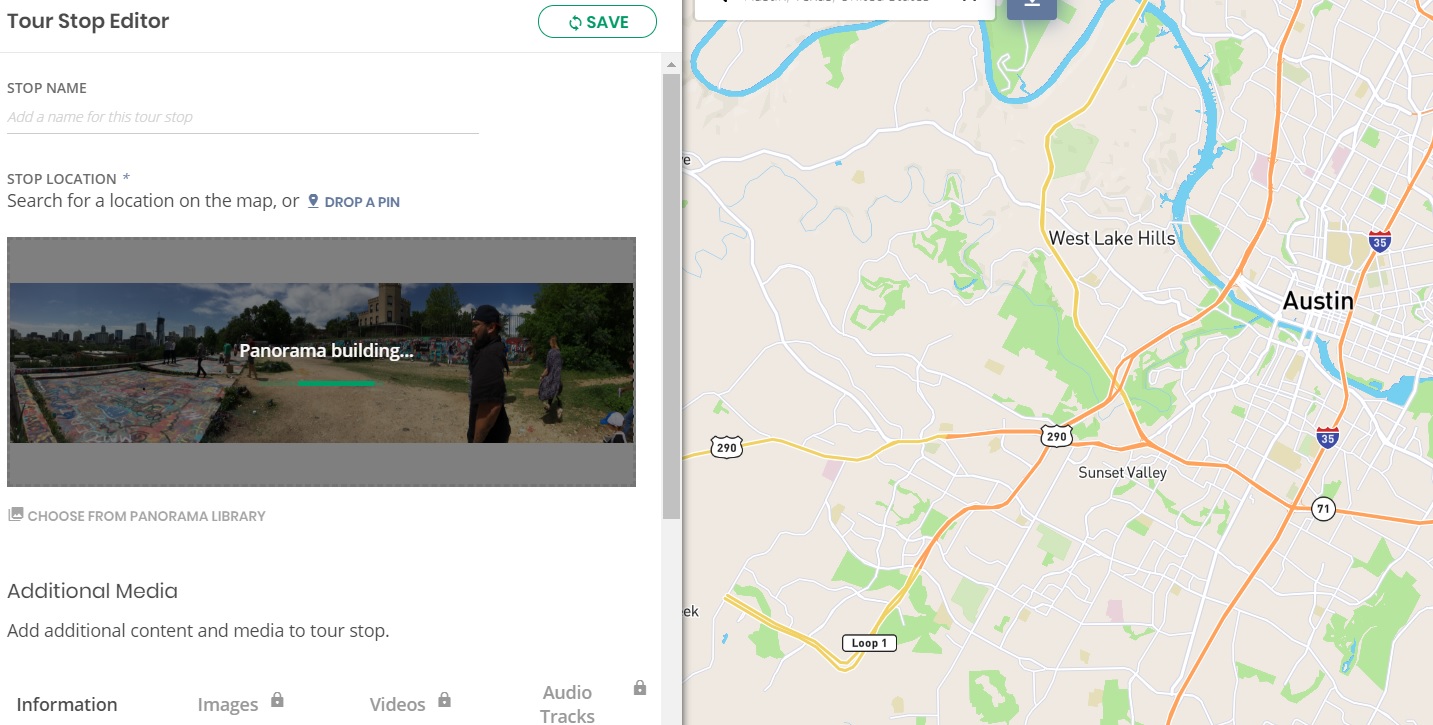 After you enter that information it is time to download the media for your tour. Tour Builder supports the use of both 360-degree panorama and standard images for tour stops. I chose to use a panorama picture for my tour test run. Downloading the picture was insanely fast and before I knew it I had the start of my 1st tour.
After the picture is downloaded tours are automatically set up for viewing in VR with the necessary hardware. I only entered one stop as a test but if you wanted to add more Tour Builder guides you through the process of adding information, more images, video and audio tracks to tour stops. When all that information is entered and you viewed your tour in the preview window you must publish to make it live.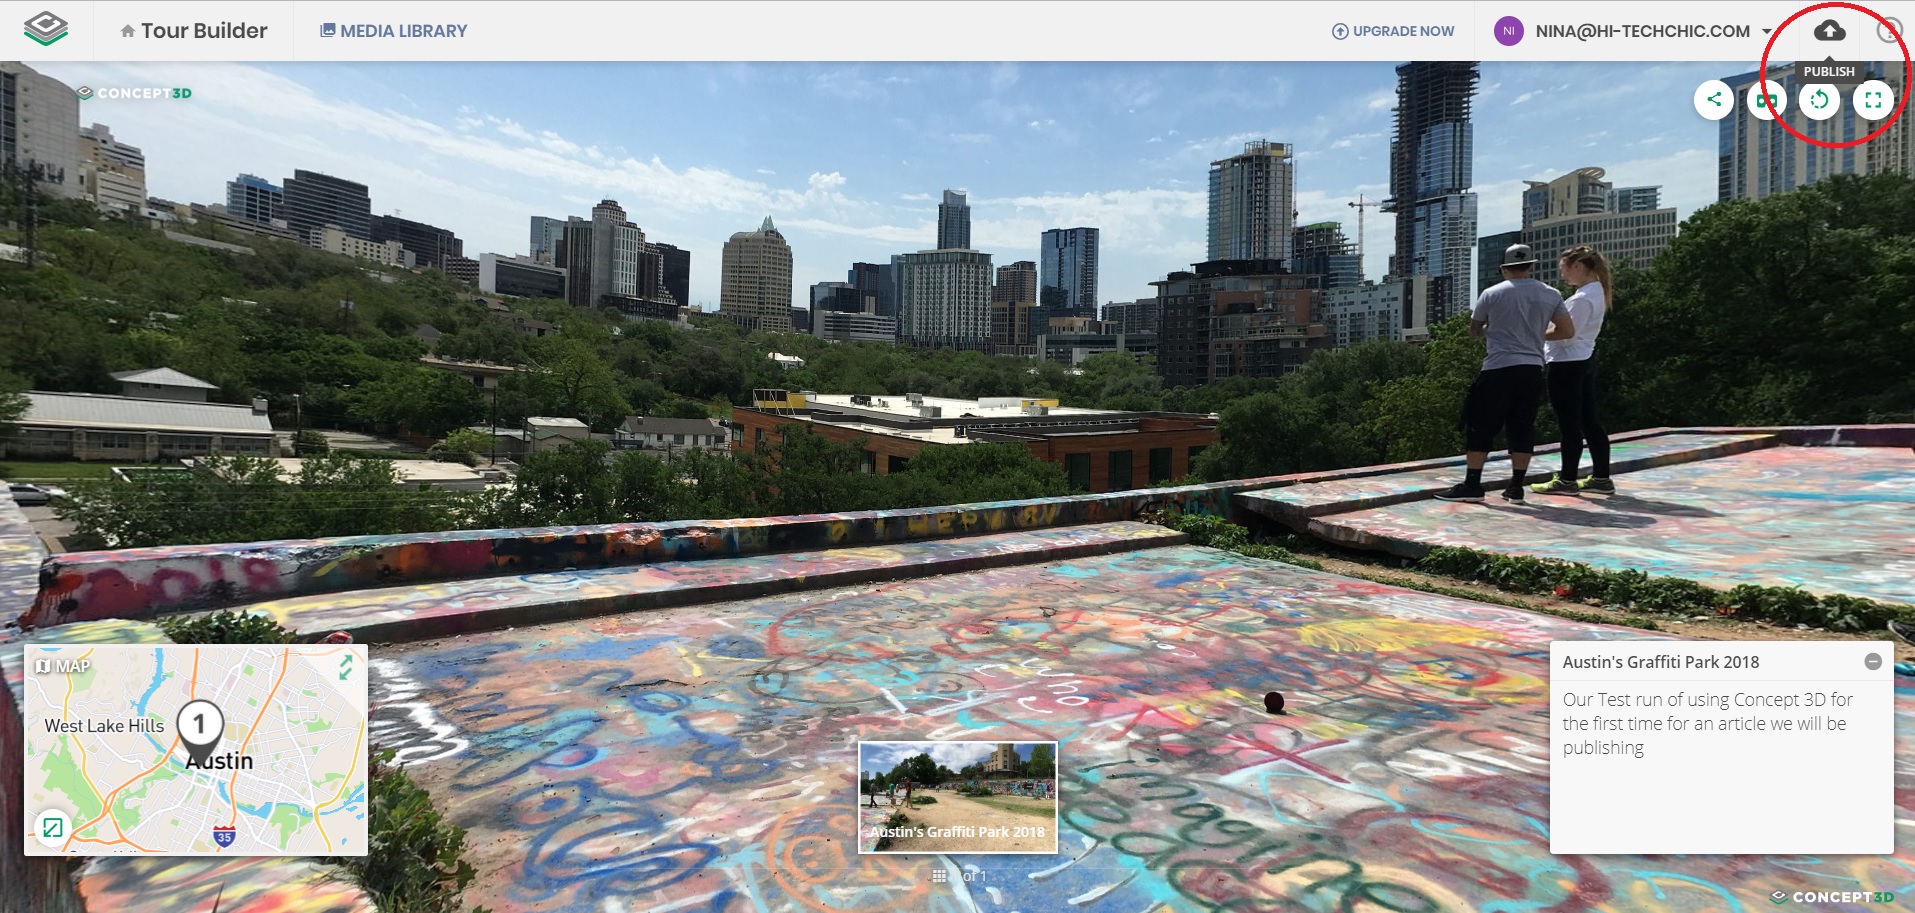
Once the tour is built and published, it can easily be edited and shared via link, and by integrating with Mapbox and OpenStreetMap.
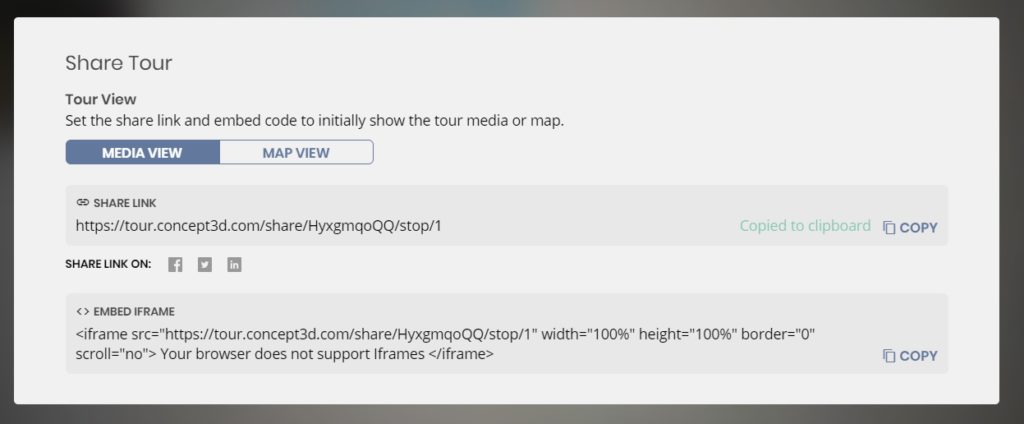
Tour Builder creates an in-window “minimap” for easy navigation and jumping between stops, and to highlight the specific geographic location. The “minimap” was one of my favorite features when creating my test tour. To make sure someone else would be able to view my published tour via the link provided and it works perfectly!
 As stated before signing up is free but Tour Builder has three tiers offering various levels of functionality and tour views. The three tiers to choose from are; Starter (free), Foundation, and Enterprise. Tour Builder’s premium functionality includes the ability to create unlimited tours, advanced tour embed options, audio narration, third-party data integrations, a built-in lead-generation system, full map platform integration and access to the Concept3D’s Client Success Team.
The overall Tour Builder experience was simple and fast, I was amazed at how quickly I made my first tour! I may just start making VR-enabled virtual tours for everything now!
To start building a tour please visit: https://tour.concept3d.com. To learn more about Tour Builder please visit: https://www.concept3d.com/use-cases/share-your-place/virtual-tours
###
Source: Concept3D
